How to Install Facebook with Google Tag Manager
Install your Facebook Pixel with Google Tag Manager
Section titled “Install your Facebook Pixel with Google Tag Manager”If you use Google Tag Manager to manage your tags, you can add your Facebook pixel to your Google Tag Manager account to measure and optimize your ad results
Creating the Facebook Pixel Variable
Section titled “Creating the Facebook Pixel Variable”1- Log in to your Google Tag Manager account and select your container.
2 - Click on Variables then in the User-Defined Variables window, click on New
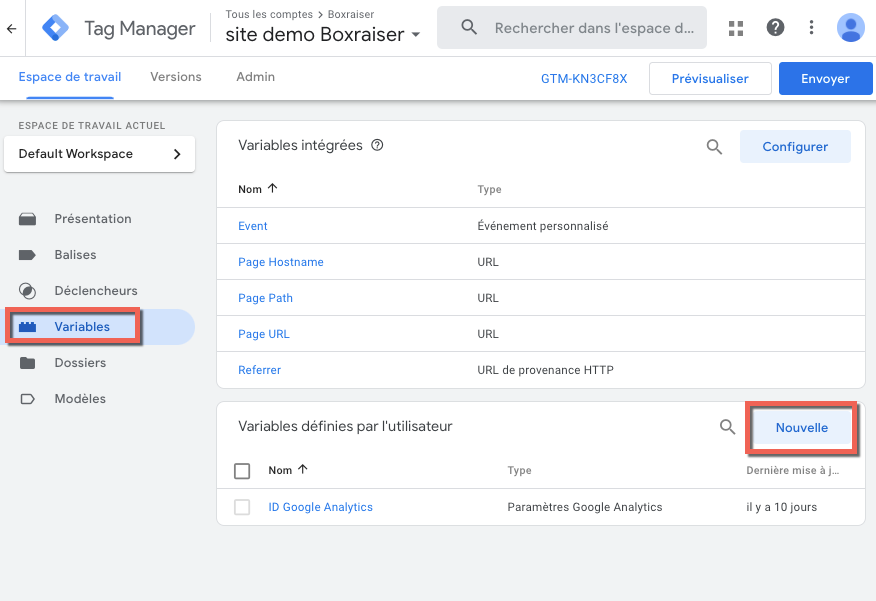
3 - Name your variable Facebook Pixel
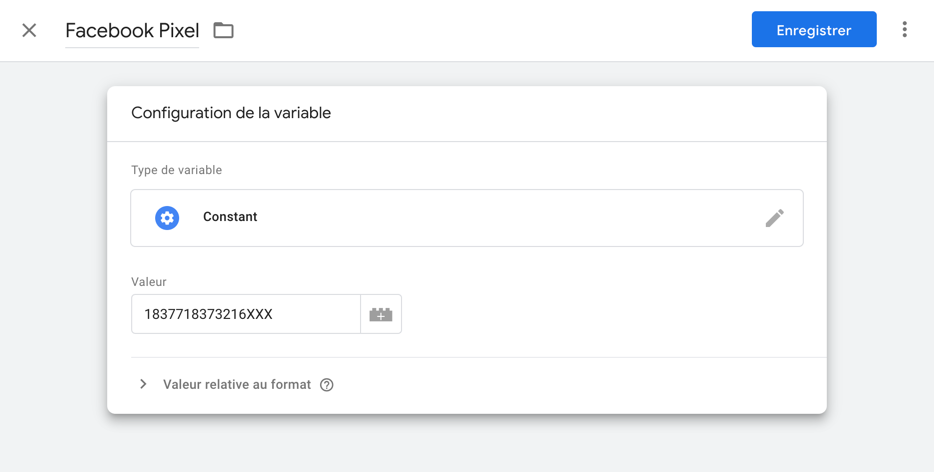
4 - Click on Variable Configuration and click on the Constant variable type
5 - In the value field, enter your Facebook pixel ID
6 - Click on Save
Creating the Facebook Pixel Tag
Section titled “Creating the Facebook Pixel Tag”1 - Click on Tags then New.
2 - Name your tag Facebook Pixel - Pageview
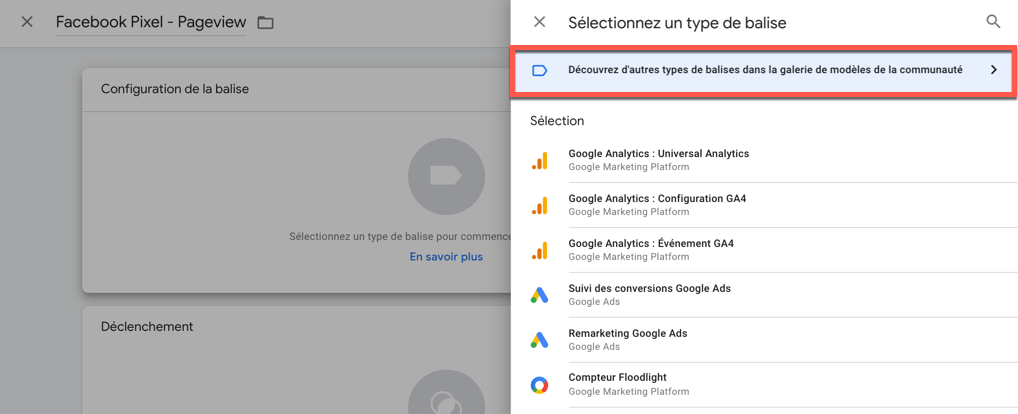
3 - Click on Tag Configuration then Discover more tag types in the Community Template Gallery.
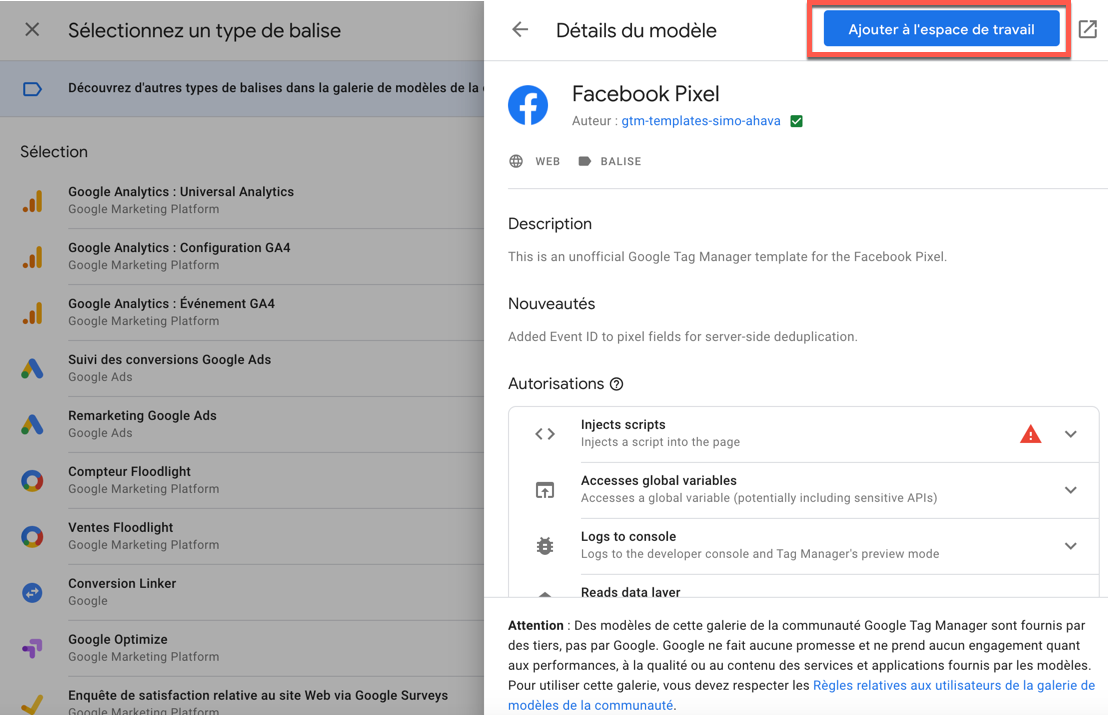
4 - Search for Facebook to filter tag types and select the Facebook Pixel tag type

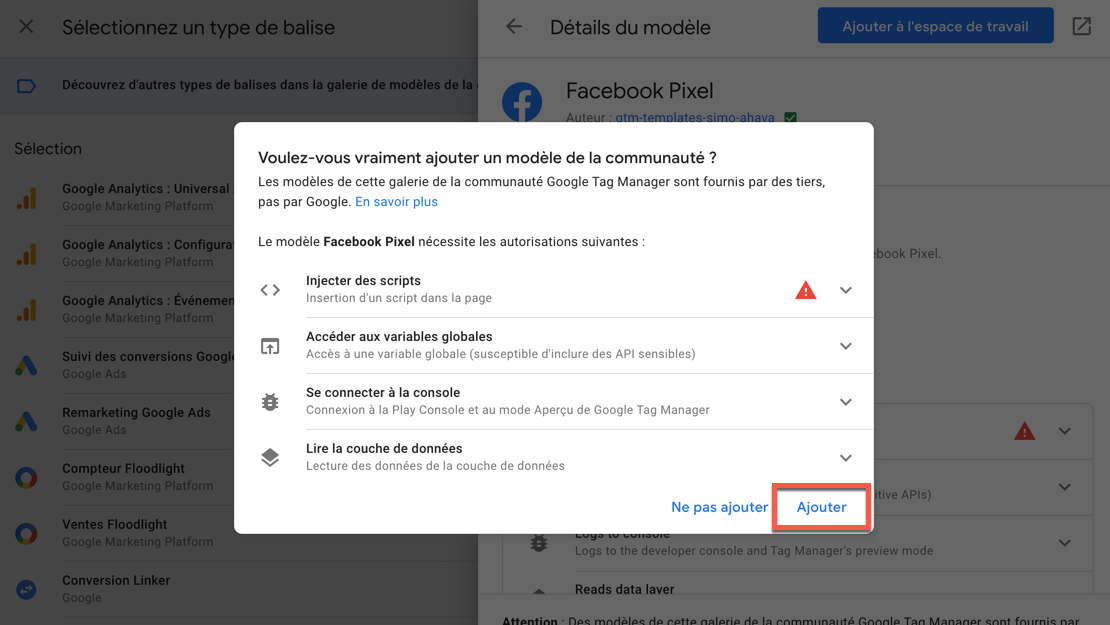
5 - Click on Add to workspace
6 - Then click on Add
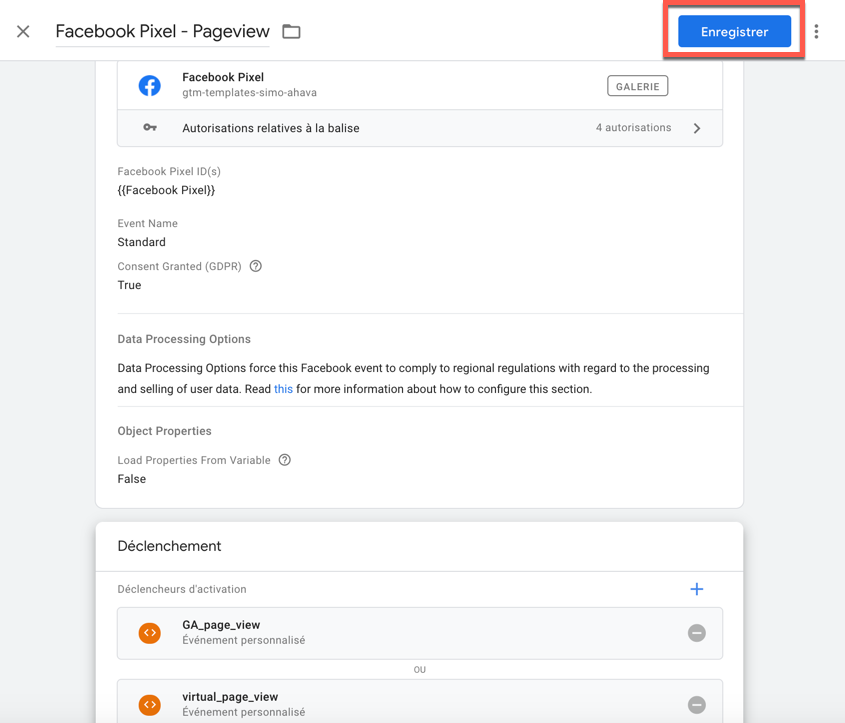
7 - Once the tag type is correctly added, in the Facebook Pixel ID(s) field click on the brick icon and select the Facebook Pixel variable.
8 - Click on Triggering and select the virtual_page_view trigger.
9 - Click on the + icon in the top right corner of the Triggering window to add a second trigger. Select the GA_page_view trigger.
!!! the virtual_page_view and GA_page_view triggers were previously created in the Install Google Analytics with Google Tag Manager article
10- Your tag is finalized, click on Save
11 - Click on Submit and Publish the container.
Create a Tag for E-commerce Actions
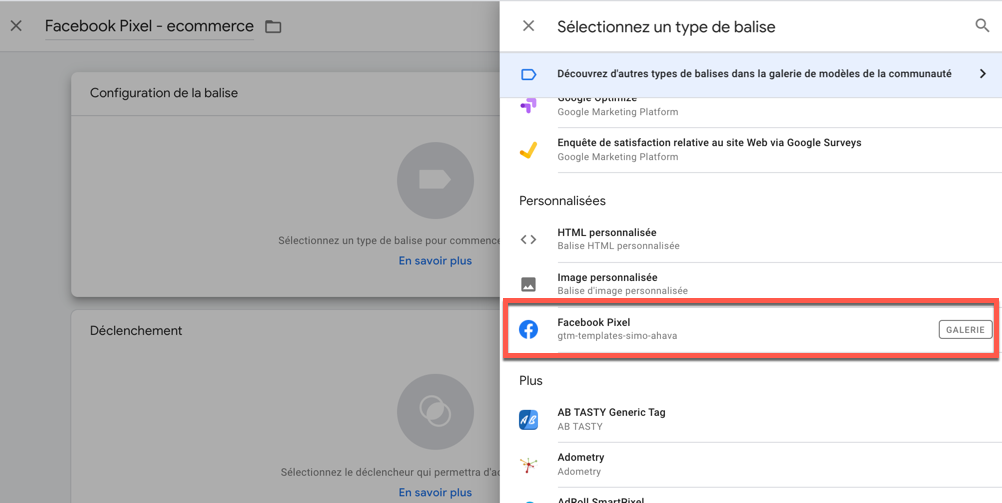
Section titled “Create a Tag for E-commerce Actions”1 - Click on Tags then New.
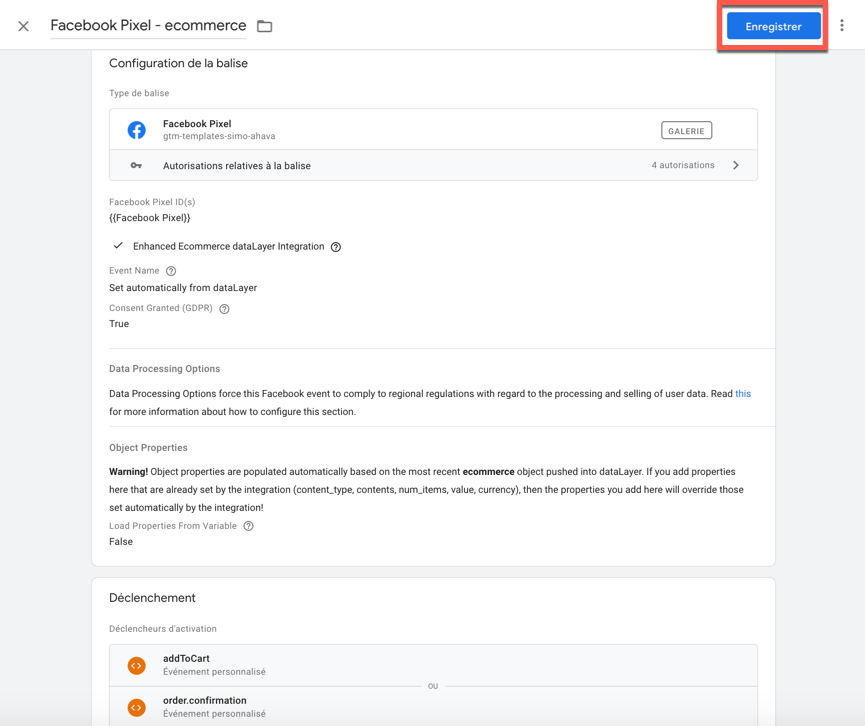
2 - Name your tag Facebook Pixel - ecommerce
3 - Click on Tag Configuration then select the custom Facebook Pixel tag type
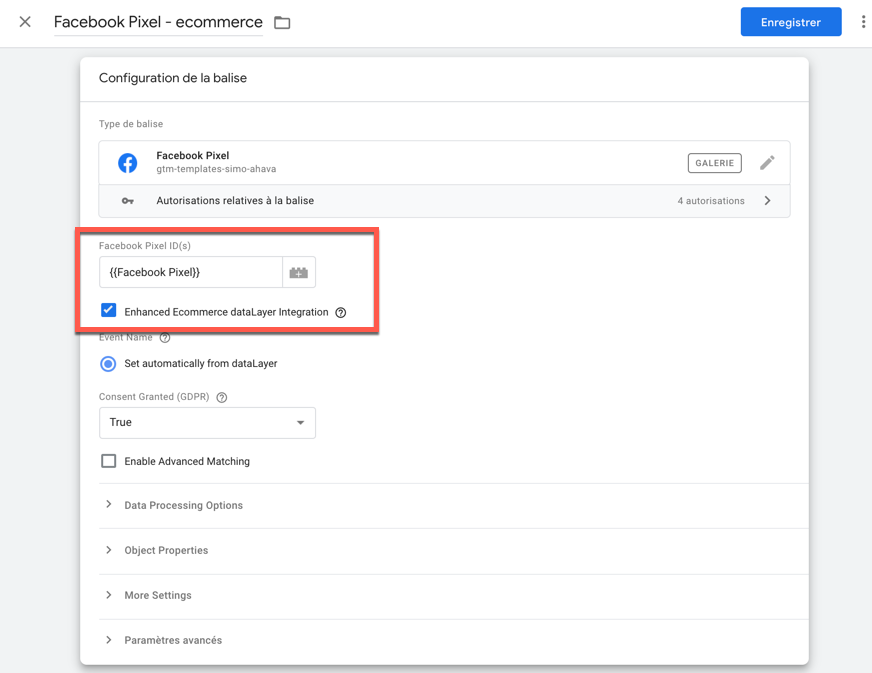
4 - In the Facebook Pixel ID(s) field click on the brick icon and select the Facebook Pixel variable
5 - Check the Enhanced Ecommerce dataLayer Integration box
9 - Click on Triggering and select the addToCart trigger.
10 - Click on the + icon in the top right corner of the Triggering window to add a second trigger. Select the order.confirmation trigger
!!! the addToCart and order.confirmation triggers were previously created in the Install Google Analytics with Google Tag Manager article
11- Your tag is finalized, click on Save
12 - Click on Submit and Publish the container.